this test didn't turn out exactly how i wanted it but i guess it still kinda works.
Tuesday, November 25, 2008
green screen horror
... the less said about this shoot the better. lets just say it didn't end well.


crazy walls!
crazy spooky fakey closet scene! the walls are made out of balloon rubber and lycra. the effect works but i think we need to put some texture or something on the "walls" to make them look more convincing. short test footage sample included!


Friday, November 21, 2008
the beast gets animated
in the middle of the night, armed with shovels and flashlights, sebastian and i dug a grave for the beast... in the middle of a park in south pasadena. residents jogged by as we scraped in the dirt trying to get the scene to look as convincing as possible: a beastly reincarnated metaphor for past tortures rising from the dead with dutiful purpose. or something like that. it's not my movie, i'm just helping to make it better.
on with the show!
this is the first piece of animation i have made for a feature length film. low budget or not i am pretty proud of this fact. and it looks darn good, too :D
on with the show!
this is the first piece of animation i have made for a feature length film. low budget or not i am pretty proud of this fact. and it looks darn good, too :D


Thursday, November 20, 2008
the beast gets a paint job
finally! the fun part!
first he gets a coat of gesso

then the some black to bring out that texture and make him look all dirty

awwww, i think someone wants to play! what a cute little beastie!

-chomp!-

believe it or not he isn't done. one more post to go!
first he gets a coat of gesso

then the some black to bring out that texture and make him look all dirty

awwww, i think someone wants to play! what a cute little beastie!

-chomp!-

believe it or not he isn't done. one more post to go!
putting it all together
so now that i took the time to separate all the vertebrae i have to put them back together again, only this time with joints. this was probably the most annoying thing i had to deal with. for the record circular brass nesting is excruciatingly difficult to work with when dealing with a heavy puppet, you either have too loose a fit and the whole thing turns on its axis or you layer it up with too much apoxy and the darn thing is so tight you might as well have glued the joint in place making the whole point of brass nesting null and void. unfortunately the place i went to only had the circular kind, not the square kind of brass nesting. next time i will take the extra effort to find the square nesting. so worth it!!!

after slamming my head into the table a thousand times from using that horrible round brass nesting it was time to see how the puppet looks assembled. unfortunately he has no feet so i had to stand him on his head. looks good to me!

i made a wood base, drilled a hole and shoved some more of that brass nesting and wire slathered with appoxy into place. after that was set i was able to attach the vertebrae.

and finally after all that was set, TA-DA! bone beast! about ten seconds later the whole thing toppled over and i spent the better part of the next day removing joints, re-gluing, sanding, etc etc until i decided to remove all the replaceable joints in favor of non-replaceable thicker wire joints. if i knew then what i knew now..... *grumbles something about the joys of puppet making*

Wednesday, November 19, 2008
porkchops and kabobs
how to make porkchops:

step 1: assemble the necessary ingredients

step 2: porkchops!
how to make kabobs:

step 1: form the nuggets on the stick and cook

step 2: spend an hour tediously removing nuggets from stick using a dremel with a metal sawing blade and 60 grit sanding bands. mental note: kabobs will stick fast to brass! next time assemble kabobs as single pieces instead.
i'll stick with porkchops for my next party. porkchops make fabulous porkchop sandwiches. (yes, you can say it now) PORKCHOP SANDWICHES!!!
jaw of the beast
more progress on the bone beast. i actually finished him today but i'll keep going with these progress pics until i get to the grand finale. this is harder for me than it is for you, trust me. it looks so bad ass! i can't wait to post ZOMG!!!11!!!1!ONE!
anyway....

i formed some plumbers apoxy around some brass nesting in the skull, this is where the joints will fit in allowing the jaw to be animatable.

more wire and mesh. the joints are there too.

i like boiling my sculpey rather than cooking it. i don't know if it makes it any stronger but i think it cooks more evenly that way.

bone beast like cooking, too. mmmmmmm... beasty burgers...
stick around for pork chops and kabobs!
beginning the bone beast
for some reason i thought making a complicated stop motion puppet would be just the thing for a low budget movie with a deadline of just 4 weeks to be completed. and with multiple other shoots to be completed as well. yeah. awesome.
well anyway, meet the bone beast! or at least part of him.

making the wire frame

putting on the base clay

shaping the form

adding all the details
next post: the lower jaw! and maybe a few other things. we'll see.
well anyway, meet the bone beast! or at least part of him.

making the wire frame

putting on the base clay

shaping the form

adding all the details
next post: the lower jaw! and maybe a few other things. we'll see.
Tuesday, November 18, 2008
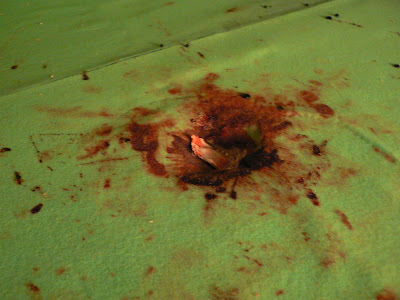
first squid row shoot
a lot has happened in these last few weeks. here at squid row we managed to land our first low budget movie deal (underline low) and have been working feverishly to get all the work done. but also in that same span of time my cat died, i got hit by a bus (yes, i really did and i am still walking!) and ringtales (my employer) is now going under. things aren't just busy they are crazy! and rather emotional... at least for me. but we still progress on here at squid row, trying to make this studio a reality.
last week we got our first official shoot under the belt with more footage being completed every day. this shoot involved a door and some very bloody fingernails. for obvious reasons i am not allowed to post the footage here (as if anyone would find it here and spread it all over the internet) but here are a few photos from the shoot: cameraman sdebastian and manicured lady-man moses.


last week we got our first official shoot under the belt with more footage being completed every day. this shoot involved a door and some very bloody fingernails. for obvious reasons i am not allowed to post the footage here (as if anyone would find it here and spread it all over the internet) but here are a few photos from the shoot: cameraman sdebastian and manicured lady-man moses.


Thursday, November 6, 2008
ziggy star bear, the costume from mars


so this is the rest of my halloween costume. i made the mask the night before and the day of halloween i added a cape, power cuffs (eeee!), excessive shoulder pads, crazy awesome shoes and lots and lots of glitter! the shoes were the fastest part made in about 10 minutes. i just wrapped cardboard around some walking shoes with duct tape and then covered the tape with glitter and glue. the fuzzy leg warmers were just scraps from the cape that i safety pinned to my pants. not bad for a last minute costume but i think this officially puts me in the "major dork" category. i felt like i was a 12 year old boy wearing it at the cal arts party. but it was a ton of fun to make, and i could even dance in it!
also, please to enjoy my pumpkin.
Subscribe to:
Posts (Atom)